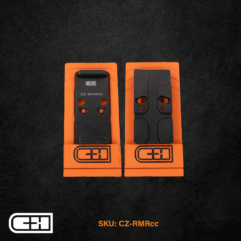
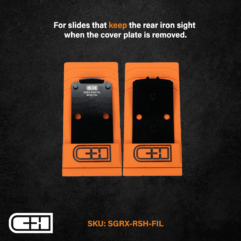
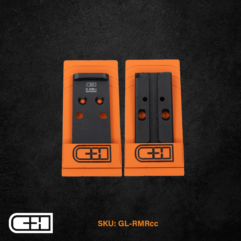
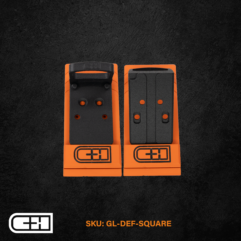
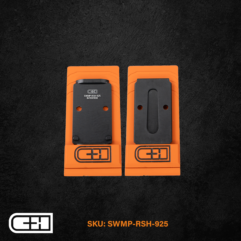
The C&H Precision plates are designed, manufactured and shipped from our small family owned business in Coastal Georgia. Each plate is precision machined to the tightest tolerances on HAAS CNC machines and each plate goes through multiple quality checks before shipping to our customers.
SPECIFICATION:
Material: Plates are made from 6061 aluminum. All mounting hardware is Stainless Steel
Finish: Plates are MIL-SPEC Type III Hard Anodized – Black
INCLUDED:
Qty 1 – Optic Plate
Qty 3 – M4 x 6MM M3H Plate Mounting Screws
Qty 3 – 4-40 x .345 FHB Trijicon SRO , CHPWS COMP / EDC-XL Optic Mounting Screws
Qty 3 – 4-40 x .320 FHB Trijicon RMR Optic Mounting Screws
Qty 3 – 4-40 x .280 FHB Holosun 407C / 507C / 508T Optic Mounting Screws
Qty 3 – Stainless Steel T-Nuts
DRY-FITTING DISCLAIMER:
At C&H Precision, our products are designed and manufactured to meet tight tolerances. Installation can be affected by variations in your plate, hardware, optic, and firearm tolerances. For safe installation and to prevent potential damage to any component, we advise dry-fitting all parts before a full installation. If any problems arise during this process, please reach out to our Customer Service via our
contact portal.
IRON SIGHTS DISCLAIMER:
When making aftermarket firearm modifications, factory components can often become obsolete, particularly when mounting optics on the slide, whether through direct milling or using a plate. Achieving the correct height for low co-witness iron sights depends on factors such as the firearm type, mounting plate, optic, and slide cut. For assistance in determining the appropriate iron sight height for your specific setup, please contact our Customer Service team through our dedicated
contact portal.
Only logged in customers who have purchased this product may leave a review.
d2consultants (verified owner) –
purchased SAHC-RSH for EAA Witness 2311
BACKGROUND:
I was in a crunch to swap out the cheap red dot sight that came with the pistol before an upcoming match and had about 1 wk to work with. the Freedom Gorilla website led me to the CHPWS website. chpws was the only option i could find with a ready made plate to go from my RMSc slide cut to RMR to mount a Holosun 507C. i received the plate and optic from both companies from the other side of the country in less than 1 wk (~4 biz days) which gave me 2 days to mount and sight in ahead of my match. i truly appreciated the chpws online tutorials which demonstrated adaptor plate mounting best practices in short, concise, visual video clips.
INSTALL PREP:
it is important to note that this plate, although very close, was not “drop-in” to the Witness 2311, the key differences were (a) the slide cut had straight (perpendicular) cuts forward and aft while the plate had a very slight radius (i take it to perfectly match the Springfield Hellcat slide cut)…(b) the RMSc forward bosses or male sockets sticking up from the slide cut have a “half-moon” or D-shaped profile along with a larger overall diameter vs the female holes in the plate, (c) given the gun is made overseas under a metric convention, and given the extra screws that came with both the plate and the optic were all SAE (4-40, 6-40, 8-40) the next time crunch for me was with regard to the plate mounting screws but i will come back to that.
INSTALL:
STEP 1- since the plate was aluminum i was able to use a dremel tool and small grinding wheel to lightly skim the radius on both ends of the plate, working from the middle of the radius and left and right about 1/4 inch. upon lining up the mount holes i could see the overlap of the radius on each end was only 1/32″ to 3/64″ in length. so i mounted the flex shaft tool head of the dremel in a vice and gently went back and forth on the front and back edges of the plate until a tight fit (tap in with a small non-marring gunsmithing hammer) into the slide cut was achieved while keeping the mounting holes to the slide perfectly aligned.
STEP 2- once the plate was fitted to the slide cut the next obstacle was fitting the smaller female holes in the plate to the larger male socket/bosses on the slide (these bosses are actually a D-shape)…i lightly tapped the plate down onto the bosses with the gunsmithing hammer until i could see an imprint of the interference spots on the underside of the plate…followed by wallowing out the female holes little by little with a tiny grinding tool until the plate could be tapped down fully flush with the slide cut.
STEP 3- next came the main mount holes in the slide which are tapped M4-0.7x 5mm deep (also compatible with 8-36 which i could not find). including the thickness of the plate i was needing 2 ea M4-0.7 x 8-9mm (or 5/16″) long weaver or oval head to countersink flush in to the top of the plate while engaging most of the threads in the slide without bottoming out. again, given my time crunch, i zipped down to my local ACE Hardware to go through their abundant gun screw drawers (all of which were SAE and none were the compatible 8-36 thread type). i didn’t find metric gun screws but did find M4-0.7 x 10mm machine screws which worked thread-wise but their beveled heads were quite a bit bigger than what was in the plate plus the length was slightly too long.
STEP 4- i then went to work on the top of the plate mount holes with a countersink tool to get the larger screw heads flush as well as see what the final stick out length would be…i did have to go pretty deep with the countersink tool which did get slightly in to the back edge of T-nut profile underneath which isn’t ideal but still left enough structural meat. lastly, i had to shorten my screws by 1 – 1.5mm which i accomplished by screwing them into a tapped plate with stick out and again hitting them with my trusty dremel tool. LESSON: procuring the correct M4-0.7 x 8 or 9mm long oval or tapered head gun screws would be a vastly superior solution here (freedom gorilla offers them, perhaps chpws or your local gunsmith also has them)
STEP 5: i took a birchwood casey black paint pen to touch up the exposed white metal on the plate that was visible forward and aft of where the plate meets the edges of the slide cut
final notes- all in all i deem my experience a success. i shot my match with it and everything stated tight. all of these steps were trial and error and took patience; going back and forth checking fit, 5-10x, to insure too much was not taken off with the dremel and countersink tools. that said, start to finish for me was 4 or 5 hrs incl the trip to ACE Hardware. i also acknowledge this particular pistol being so new on the market as being a big driver in why i had to custom fit this plate. in due time i would expect great companies like chpws to get their hands on one of these guns and manufacture in the necessary edits to the plate; truly making it “drop-in”.
David D.
Arvada, CO
(i do have a pic that shows the slide cut and how the final mounting of the optic turned out but i could not find a way to include it here- perhaps Wes in customer service can attach it to this review?)